How to repair a flat roof depends entirely on what's actually wrong with it: a hairline crack, a failed seam, or a membrane that's simply worn out. Small damage is often a weekend fix with roofing cement and a utility knife, but ponding water or soft decking usually means a professional needs to look before anyone starts cutting into the membrane. This guide walks through diagnosis, safety, and the actual repair steps in the order a roofing crew would use them.
Warning Signs Your Flat Roof Needs Repair
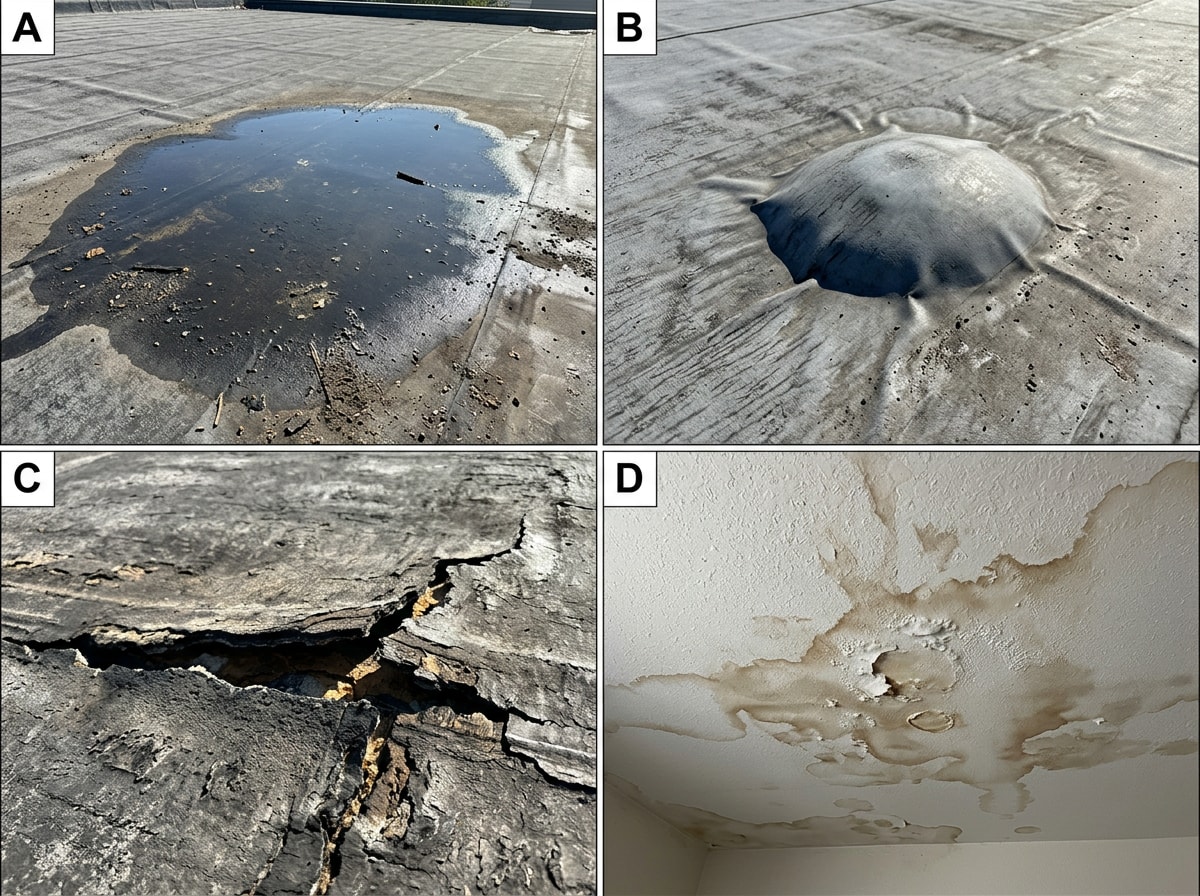
A flat roof needing repair usually shows one of four signs:
- Interior water stains or active drips
- Ponding water that sits more than 48 hours after rain
- Blisters or bubbles where moisture has gotten trapped under the membrane
- Visible cracks or splits in the surface
Catching these early keeps a small fix from turning into a full tear-off. Interior ceiling stains often show up far from where the leak actually started, which is why tracing the source matters more than patching the stain itself. Ponding water adds constant weight and slowly breaks down membrane seams. Membrane blisters feel soft or spongy underfoot and tend to grow over time. Cracks are usually the easiest damage to catch during a quick visual walk.
If you're seeing more than one of these signs at once, it's worth having a professional take a look through our Roof Repair services before deciding whether a DIY approach makes sense.
How to Locate the Source of a Flat Roof Leak
Water travels along rafters, insulation, and seams before it finally drips through the ceiling, so the wet spot inside your home is almost never directly under the actual hole. The two steps below use an interior-to-exterior method to narrow down the real location.
Use the Closest Walls to Estimate the Location
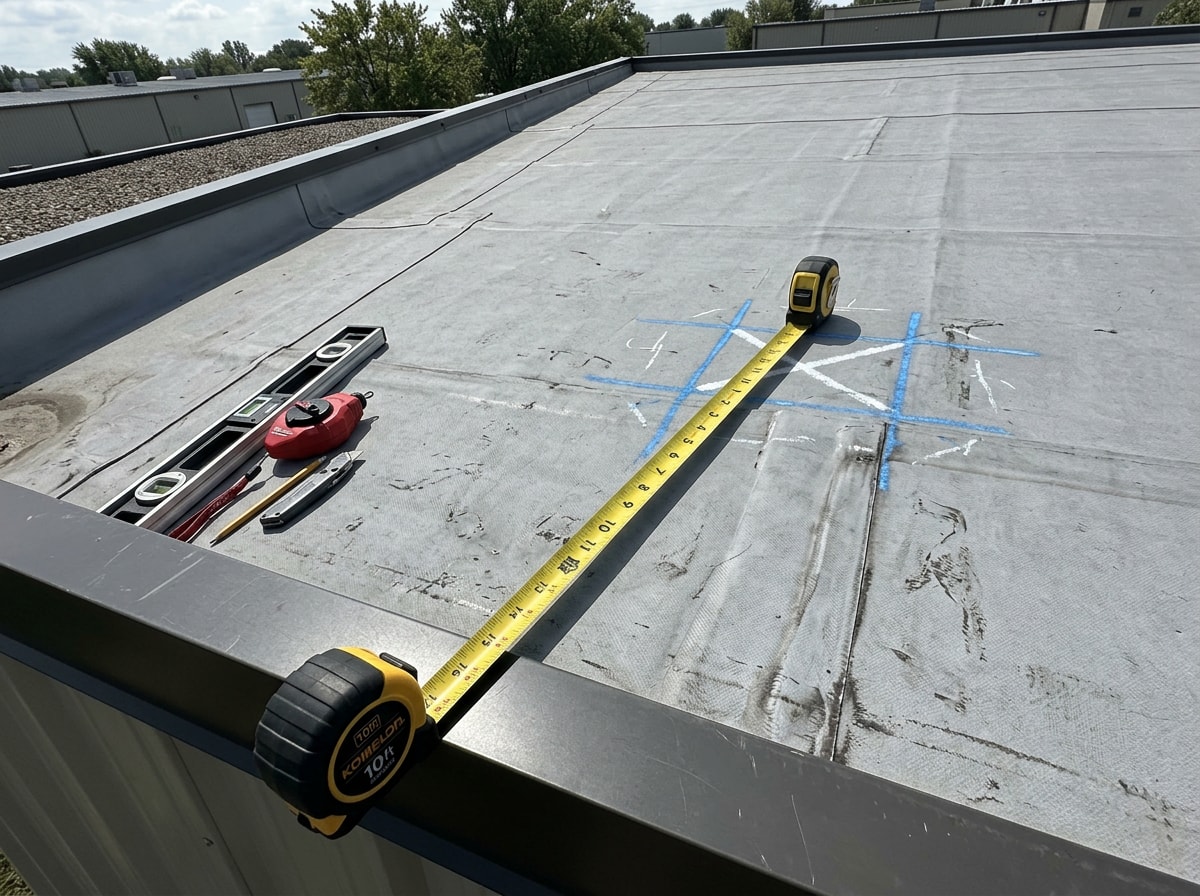
Go inside first and find the discolored or wet ceiling spot. Measure its distance from two intersecting interior walls using a tape measure. Transfer those same two measurements to the roof above, starting from the matching exterior walls, to get a reasonably close starting point for your search.
This won't pinpoint the leak exactly, but it narrows a whole roof down to a few square feet. From there, a visual check for cracks, blisters, or lifted seams in that area should trace the leak source fairly quickly.
Check the Seams
Flat roof seams are one of the most common failure points, since they're where separate membrane sheets meet and rely on adhesive or heat-welding to stay sealed. If the surface in your estimated area looks fine, check the nearest seam next. A seam leak is patched with the same roofing cement and reinforcement method covered later in this guide, except the patch needs to overlap both sides of the seam, not just the gap itself.
Stay Safe, Gather Materials, and Prep the Repair Area
Before any cutting or patching starts, the roof needs a safety check and a thorough cleaning. Skipping either step risks a fall hazard or a patch that won't adhere.
Know Your Safety Limits
Walk the perimeter first and look up for sagging, soft spots, or sections where the membrane appears lifted or bubbled before climbing up. If any section feels soft or spongy underfoot once you're on the roof, stop immediately. That's a sign of compromised decking that can give way under your weight.
Employees working on low-slope roofs with unprotected sides and edges 6 feet or more above a lower level must be protected from falling by guardrail systems, safety net systems, personal fall arrest systems, or a combination of a warning line system with one of those protections , or by a safety monitoring system on narrower roofs. Residential DIY repairs rarely involve that kind of equipment, which is exactly why structural concerns or steep edge exposure are a sign to call a professional rather than risk it.
Materials to gather before climbing up:
- Utility or roofing knife
- Wire brush or stiff broom
- Roofing cement and a trowel or putty knife
- Fiberglass mesh or roofing felt
- A patch cut from your existing membrane material (EPDM, TPO, or modified bitumen)
- Primer matched to your membrane type
- Clean rags and solvent
- Gloves and safety glasses
Remove Debris and Dry the Surface
Clear the repair area of dirt, leaves, loose gravel, and old roofing debris using a stiff broom, brush, or air blower. For a flat roof with built-up grime, a mild cleaning solution and light scrubbing usually gets the surface back to bare membrane.
Adhesives and cement won't bond properly over dirt or loose material, so this step isn't optional. Just as important: let the surface air-dry completely. Any trapped moisture under a patch will eventually cause it to fail. If you want a second opinion before you commit to a DIY fix, our Roof Inspection services page covers what a thorough pre-repair inspection should include.
Sealing Small Cracks and Holes
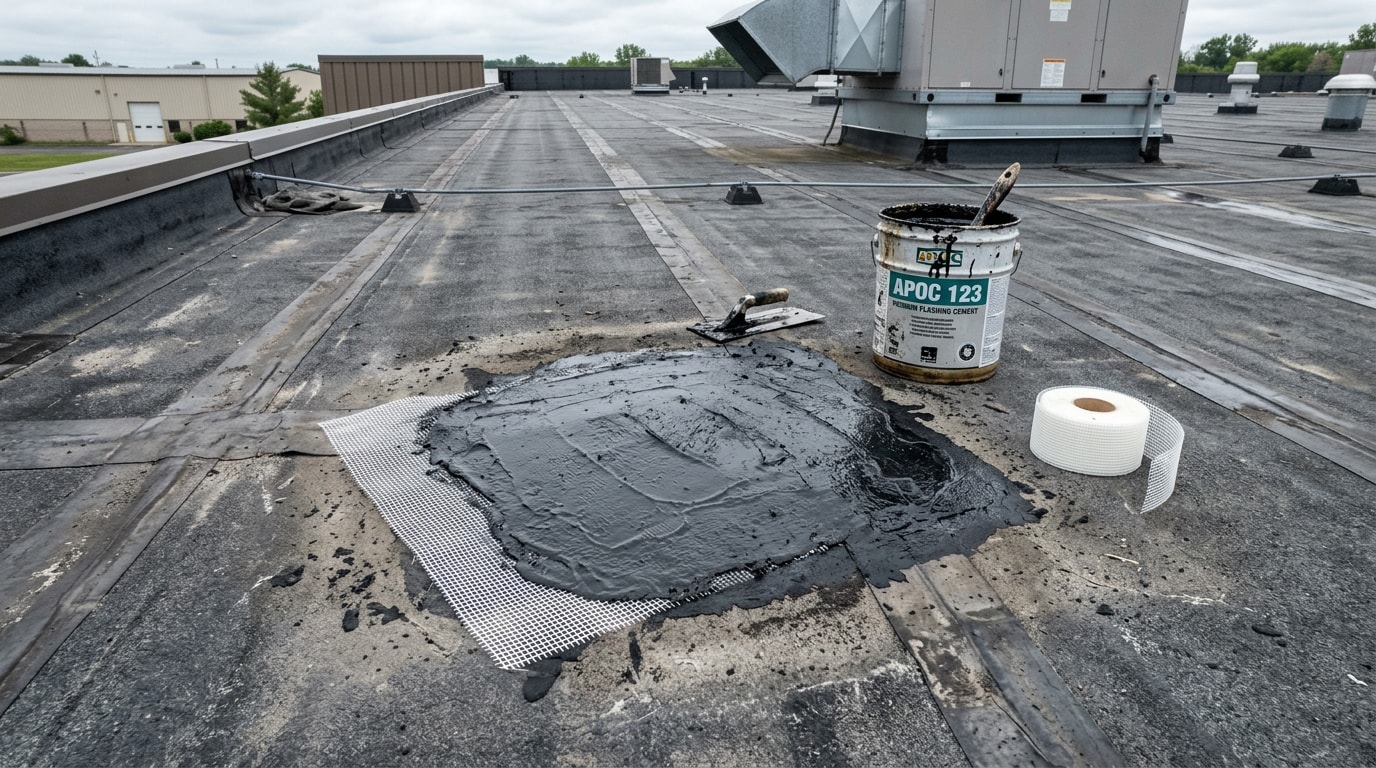
For surface damage under about two inches, roofing cement reinforced with fiberglass mesh is the standard fix and doesn't require cutting into the membrane.
- Dry the area with clean rags and let it air out for at least 15 minutes before applying anything.
- Spread roofing cement at least 2 inches past the edges of the damage, pressing it in to form a layer roughly 1/8 inch thick.
- Press a piece of fiberglass mesh or roofing felt into the wet cement, then smooth it until the original crack is no longer visible.
- Apply a second layer of cement over the mesh and all its edges to fully seal the crack and lock the patch in place.
- Let it cure fully before walking on it or exposing it to rain.
Using Roof Patches to Repair Larger Damage
When damage is too large for cement alone to handle, a cut-and-patch method replaces the compromised section of membrane entirely.
Cut Out the Damaged Area
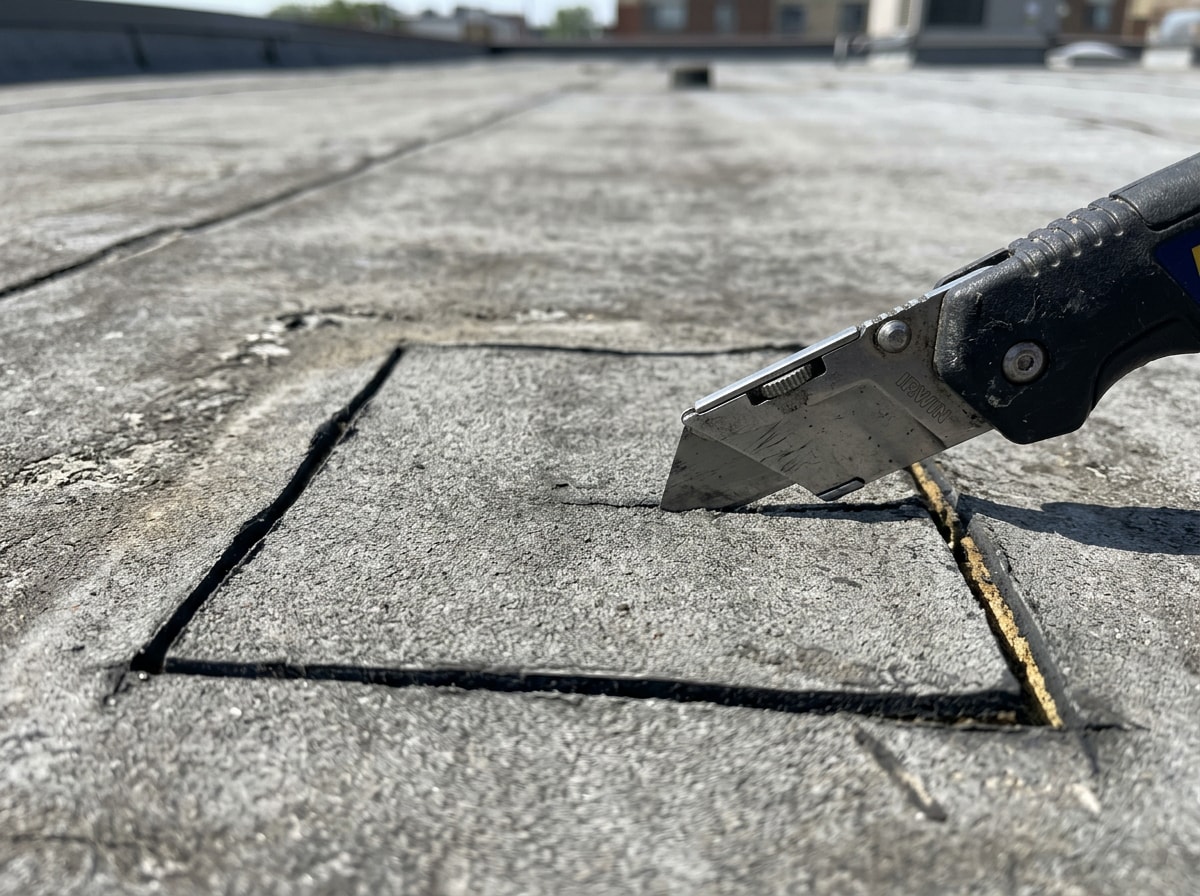
Using a sharp utility knife, cut about an inch deep into the membrane around the damaged section, forming a clean rectangle. Work slowly and go deeper only as needed until all compromised material is removed, being careful not to cut into the sound membrane underneath.
Apply the Patch
- Fill the cut-out area with roofing cement.
- Place a patch cut from the same membrane material as your existing roof directly over it.
- Press down evenly across the entire patch until it sits flush with the surrounding roof surface.
- Check for lifted corners. Any gap means more cement or pressure is needed before it cures.
Match Your Patch Method to the Roof Material
Before any patch goes on, cut away loose, blistered, or saturated membrane, scrub the area with a wire brush, and wipe it down with a solvent matched to your specific membrane type. Skipping this prep is one of the most common reasons patches fail early. In the repairs our crews get called back for across North Texas, a mismatched primer or adhesive is a more frequent culprit than the patch material itself.
EPDM, TPO, and modified bitumen each require a compatible adhesive or welding method, and products aren't interchangeable across membrane types. Mixing them can cause the bond to break down well before it should, since each membrane chemistry reacts differently to solvents and adhesives.
| Membrane | Typical Repair Method | Notes |
|---|---|---|
| EPDM (rubber) | Cement + fiberglass mesh, or EPDM-specific lap adhesive |
A 2026 survey of 569 roofing professionals combined with lab research found properly installed and maintained EPDM membranes routinely deliver at least 38 years of service life
| TPO | Heat-welded patch (900°F–1,100°F, per manufacturer specs) | Requires a heat gun or welder; patches should be probed with a blunt tool once cooled |
| Modified bitumen | Torch-applied or cold-adhesive cap patch | Mastic and granule-surface patches generally overlap the damage by several inches on all sides |
If you're unsure what membrane you have, our Roof Repair team can identify it before you buy materials, especially on older built-up roofs where layers can be hard to tell apart. For a deeper look at one of the trickier flat roof systems to patch correctly, see our guide on built-up roof repair in Dallas.
Resealing the Roof with a Protective Coating
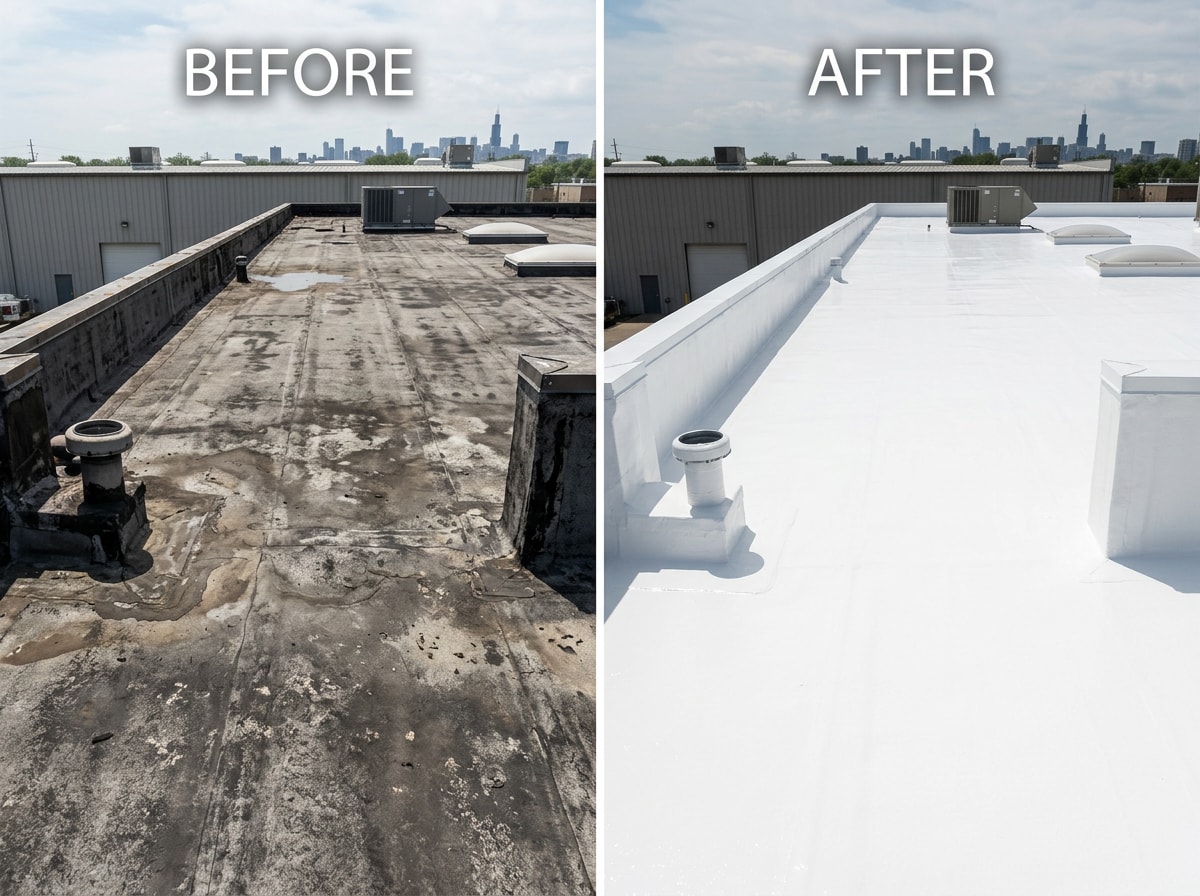
Once patches are cured, a full reseal restores waterproofing across the entire roof surface and can also improve energy performance. Clean the roof thoroughly, let it dry completely, and apply a primer as directed by the coating manufacturer before moving on.
Using a soft-bristle brush, paint the mixed bitumen sealant onto the roof, working from the far end back toward the patched or mesh-embedded areas. This keeps you from walking over wet sealant as you go.
Beyond waterproofing, a reflective coating can meaningfully cut cooling costs. The U.S. Department of Energy estimates that replacing or resurfacing conventional roofing materials with improved reflective elastomeric roof coatings can reduce a commercial building's annual air conditioning energy use by up to 25% , though actual results vary by building, climate, and insulation.
How Much Does Flat Roof Repair Cost?
Flat roof repair costs typically fall into three ranges, and these are national 2026 ballpark figures, actual pricing varies by region, labor rates, and roof access.
| Repair Type | Typical Cost Range (2026) |
|---|---|
| Minor repairs (cement patches, crack sealing) | $100–$500 |
| Patching larger damaged sections | $500–$2,000+ |
| Full replacement | $3,000–$10,000+ depending on roof size |
Material also affects cost. EPDM patches tend to be the most affordable, TPO patching runs slightly higher due to heat-welding equipment, and modified bitumen repairs often cost more because they require torch-applied or cold-adhesive layers. A cheap patch on a roof nearing the end of its life sometimes costs more long-term than addressing the underlying membrane issue once, since repeated small repairs add up and can delay a needed roof replacement. If you're weighing repair against replacement, our average roof cost guide breaks down pricing by roof type, or you can skip the guesswork and request a free estimate for a roof-specific number.
When to Call a Professional Instead
DIY is realistic for small, isolated damage you can reach safely. It stops being realistic when any of the following show up:
- Soft or spongy decking underfoot
- Leaks that return after a patch
- Damage near a drain, scupper, or HVAC curb
- Roof edges or heights that require fall protection equipment
- Uncertainty about what membrane material you're working with
Our team serves homeowners throughout the Dallas-Fort Worth area, and a same-visit inspection often costs less than the materials for a repair that doesn't hold. Visit our homepage to see the full range of roofing, remodeling, and exterior services we offer.
FAQ
Can You Repair a Flat Roof Yourself?
Minor leaks and small cracks are realistic DIY jobs if you have the right materials and follow proper prep steps. Structural damage, soft decking, or leaks that keep coming back are signs it's time to call a professional instead of continuing to repair it yourself.
What Is the Best Material to Repair a Flat Roof?
There isn't one universal "best" material. Roofing cement with fiberglass mesh works well for small cracks, while EPDM or TPO patch kits are better suited to larger membrane sections. The right choice depends on matching the patch material to your existing membrane type rather than picking whatever's cheapest at the store.
How Long Does a Flat Roof Repair Last?
A well-done patch can last anywhere from 5 to 10 years, depending on the age of the surrounding membrane, the material used, and whether prep steps like drying and cleaning were followed correctly. Well-maintained EPDM systems in particular have a strong track record for long-term durability when the surrounding membrane is still in good shape.
How Long Does Flat Roof Repair Take?
A small cement or patch repair is usually a same-day job once the surface is prepped and dry. Larger multi-section repairs can take 1–2 days, plus additional cure time before the area should be walked on again.
What Causes a Flat Roof to Leak?
Most flat roof leaks start at seams, flashing points, or areas where water ponds instead of draining. UV exposure, foot traffic, and age all break down membrane material over time, which is why regular inspections catch problems before they become interior leaks.
How Do You Find a Leak in a Flat Roof From Inside the House?
Find the wet or stained ceiling spot, measure its distance from two intersecting interior walls, then transfer those same measurements to the roof above using the matching exterior walls as your starting point. From there, inspect that general area for cracks, blisters, or lifted seams.