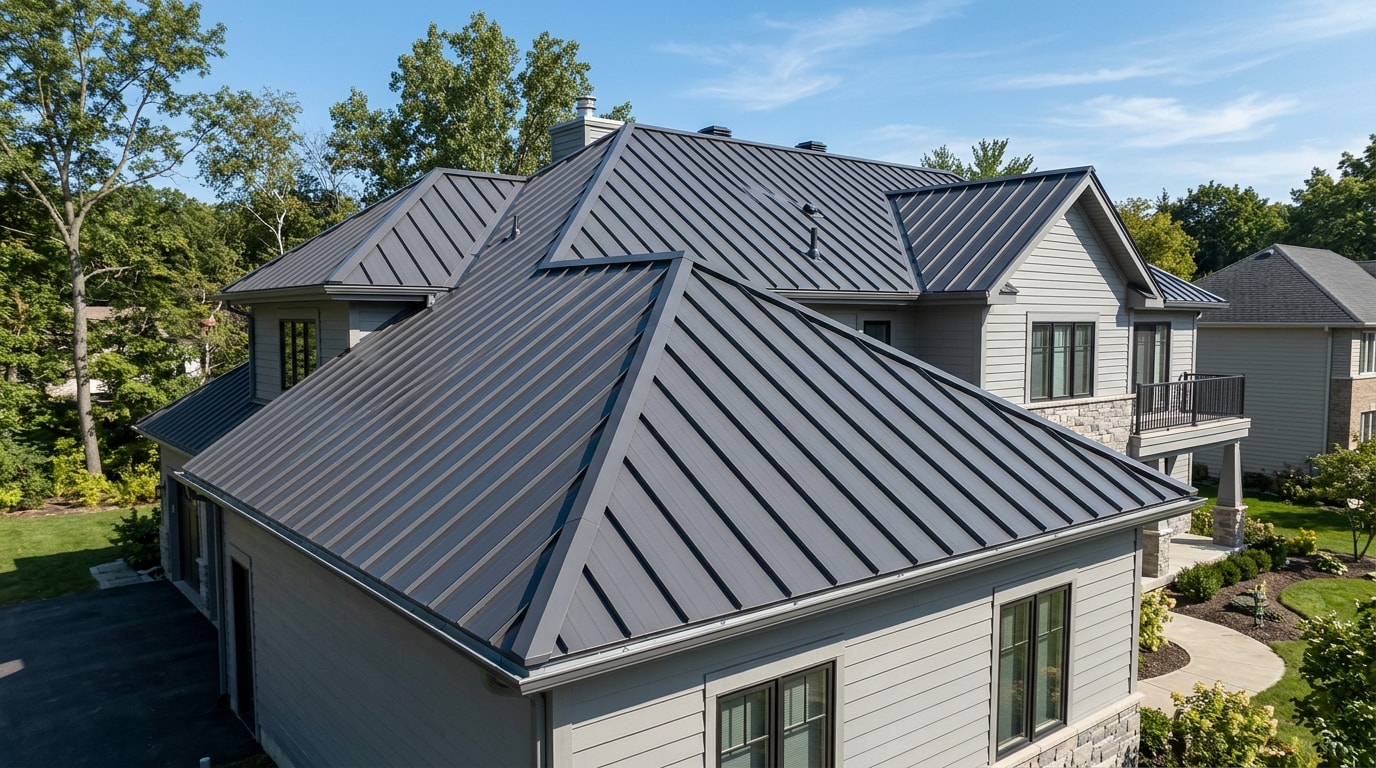
Metal roofs are installed by repairing and waterproofing the deck, rolling out underlayment, then fastening panels or shingles in overlapping rows before sealing every edge with trim and flashing. The order changes slightly depending on whether a crew is running standing seam, exposed-fastener panels, or metal shingles, but skipping a layer is how a roof ends up leaking within a few years instead of lasting decades. Here's the full sequence a licensed crew follows, step by step.
Visit Revitalize Roofing and Construction to see our services and request a free estimate.
What Happens During a Metal Roof Installation
A professional install isn't just "screw metal to the roof." It's a sequence: evaluate the existing roof, pick the right metal system, handle tear-off or deck repairs, lay underlayment and edge trim, set the panels, flash every penetration, then finish with ridge caps and a cleanup walk-through.
The crews we send out across Frisco, Dallas, and the rest of the Metroplex follow this order because it's the one sequence that holds up to Texas hail, heat, and straight-line wind. Skip a step to save a day and the roof usually tells on itself during the next storm season.
Homeowners comparing contractors before committing to a system can review the full range of services on our roofing contractor page, which breaks down repair, replacement, and inspection options side by side.
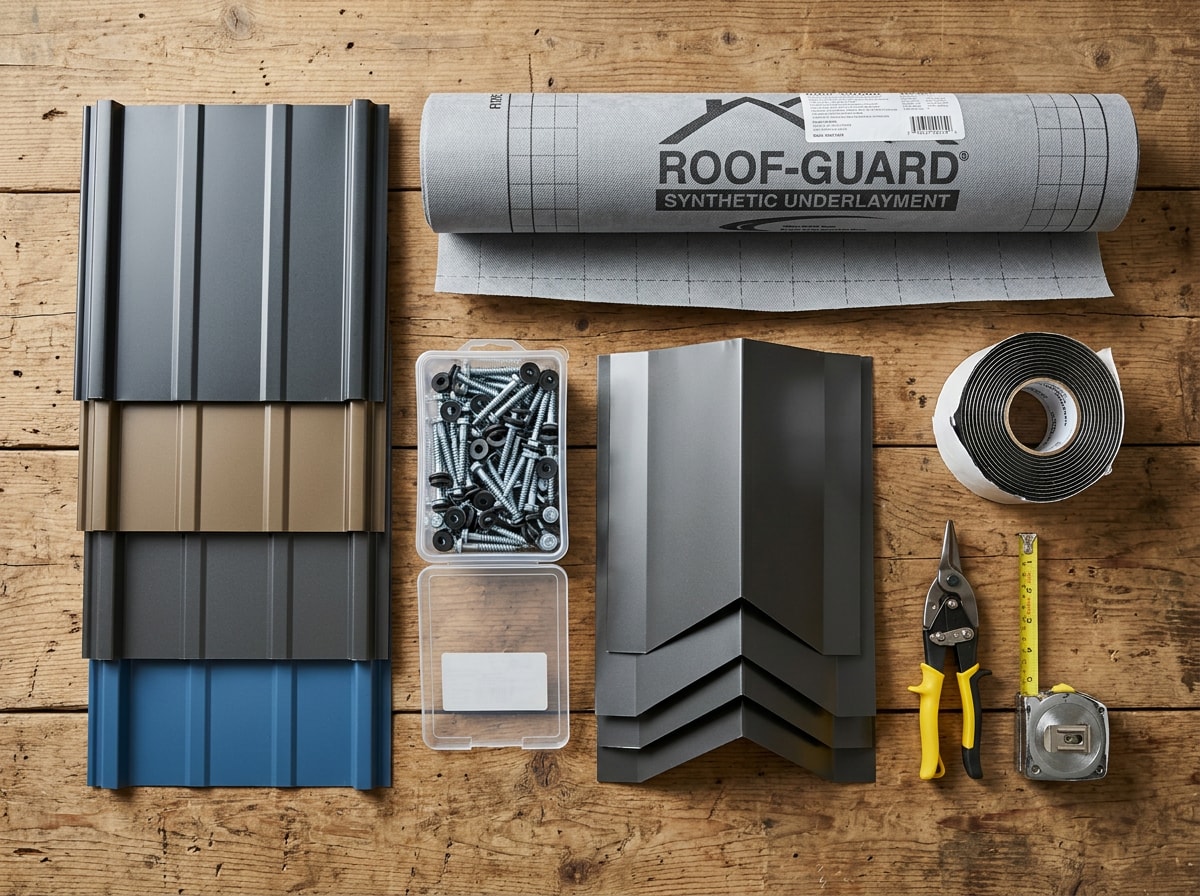
Tools and Materials Needed for Metal Roof Installation
Before a single panel touches the deck, a crew stages the materials and tools that make the install possible. Knowing this list also helps homeowners spot a corner-cutting contractor before work even starts.
Core materials:
- Metal roofing panels or metal shingles
- Synthetic, felt, or self-adhered underlayment
- Self-tapping screws and metal-to-wood screws with rubber washers
- Butyl tape and roofing sealant
- Ridge caps, gable trim, eave trim, and sidewall flashing
- Foam closure strips (inside and outside)
Core tools:
- Drill with the correct driver bit (and a clutch setting, to avoid overtightening)
- Metal snips for trimming panels on site
- Chalk line for keeping rows straight
- Level to confirm panel alignment before fastening
Skipping the chalk line is one of the most common reasons amateur installs end up with visibly crooked panel rows by the far edge of the roof.
Preparing the Roof Deck
Prep work decides how long the rest of the installation actually holds up. Crews inspect the existing deck for rot, soft spots, or sagging, strip old roofing material down to bare decking, and replace any damaged sheathing before anything new goes down. Skipping this step is one of the fastest ways to shorten a new roof's lifespan, no matter how well the metal itself is installed.
If the deck inspection turns up rot or soft spots, that section of sheathing gets replaced before underlayment goes down, not patched around. A roof inspection beforehand tells you exactly what shape the deck is in, and a roof repair visit can fix isolated rot without a full tear-off if the damage is limited.
Permits, Codes, and Fall-Protection Rules Most Guides Skip
Most installation guides stop at tools and panels. Two things that get overlooked just as often: permits and worker fall protection, both of which affect how (and whether) a job gets scheduled.
Many jurisdictions require a permit for new installs, full replacements, and any work that changes the roofline, and requirements vary by city and county. Checking with the local building department before scheduling work avoids delays once a crew is already staged on site.
On the jobsite side, roofers must use fall protection equipment that meets OSHA requirements whenever they work 6 feet or more above a lower level , and openings and weak surfaces on the roof have to be guarded with a personal fall arrest system, covers, or guardrails , per OSHA's guidance on reducing falls during standing seam metal roof installation. A crew that isn't set up for this isn't just cutting corners on safety, they're usually cutting corners everywhere else too.
Types of Metal Roofing Systems
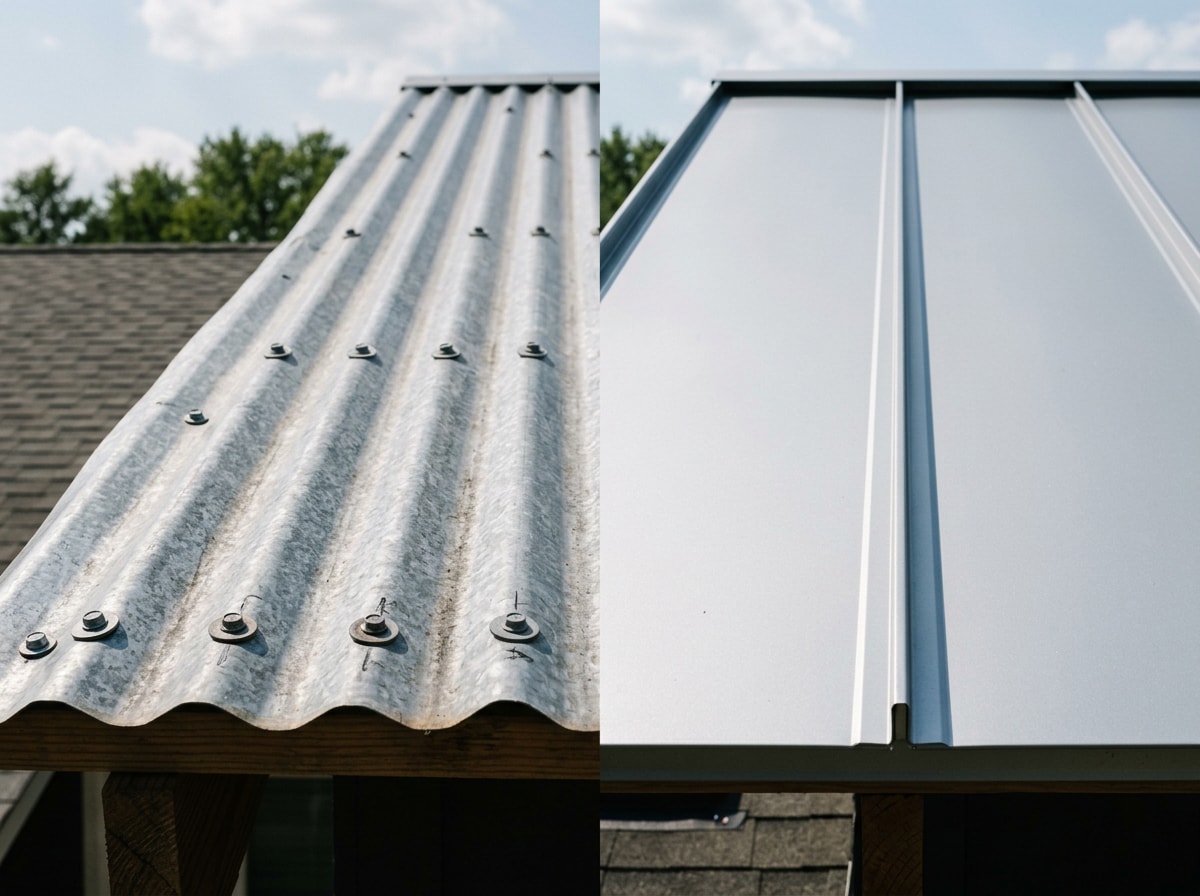
Which system a home uses changes almost every detail of the install, from fastener placement to how panels overlap.
| Feature | Exposed-Fastener Panels | Standing Seam Panels |
|---|---|---|
| How it attaches | Screws go through the panel face, with rubber washers | Concealed clips snap under raised seams, no face penetrations |
| Upfront cost | Lower | Higher |
| Long-term maintenance | Washers can dry out and crack, needing periodic checks | Fewer exposed points to fail over time |
| Typical look | Visible screw lines | Clean, uninterrupted panel seams |
| Best fit | Budget-conscious projects, outbuildings, lower-pitch roofs | Homes where appearance and longevity matter most |
Both systems fall under the broader metal roofing umbrella, and the right pick usually comes down to budget and roof pitch. If you're weighing the long-term cost difference against asphalt, our guide on whether metal roofs cost more than shingles breaks the numbers down further.
Step 1: Apply the Underlayment
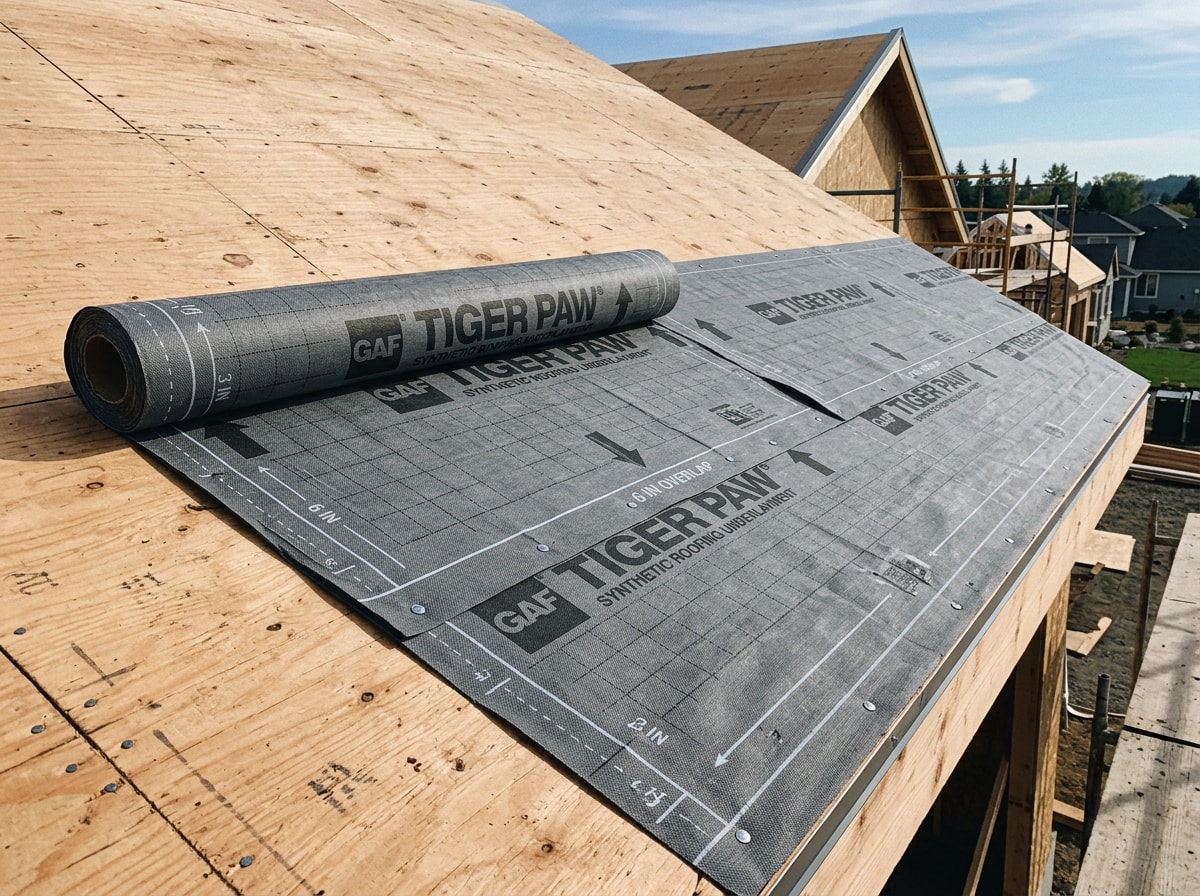
Underlayment goes down before a single metal panel is set, and it's the one step every source on metal roofing agrees matters most. Installers place foam closure strips along the eave, adhere them with butyl tape, then run a bead of sealant across the top before the first panel sits down.
From there, crews work from the bottom edge upward, overlapping each row by roughly 2 to 3 inches so water always sheds over, not under, the layer below it. Seams typically get overlapped by 6 to 8 inches for extra insurance against wind-driven rain.
Not all underlayment is the same, and the right choice depends on climate and roof pitch:
- Synthetic underlayment is lightweight, tear-resistant, and handles heat well, making it a common default in most regions, including North Texas summers.
- Traditional felt costs less but breaks down faster under prolonged UV exposure or the heat buildup that happens under metal.
- Self-adhered ice and water shield creates the strongest moisture barrier at eaves, valleys, and low-slope sections. It costs more and isn't always needed across the whole roof, but it earns its keep in hail- and wind-prone areas.
Step 2: Measure, Order, and Lay Out the Panels
Panels get measured against the roof's actual length and width, accounting for angles and overhangs, not a flat rectangle estimate. Most installers order panels 2 to 4 inches longer than the measured roof dimensions, which leaves enough material for a proper overhang and clean runoff at the eave.
Before the first panel goes down, crews snap a square chalk line off the eave to keep every following row straight. This reference line matters more than it looks like it should: every other panel on the roof lines up off of it.
Step 3: Set and Fasten the Panels
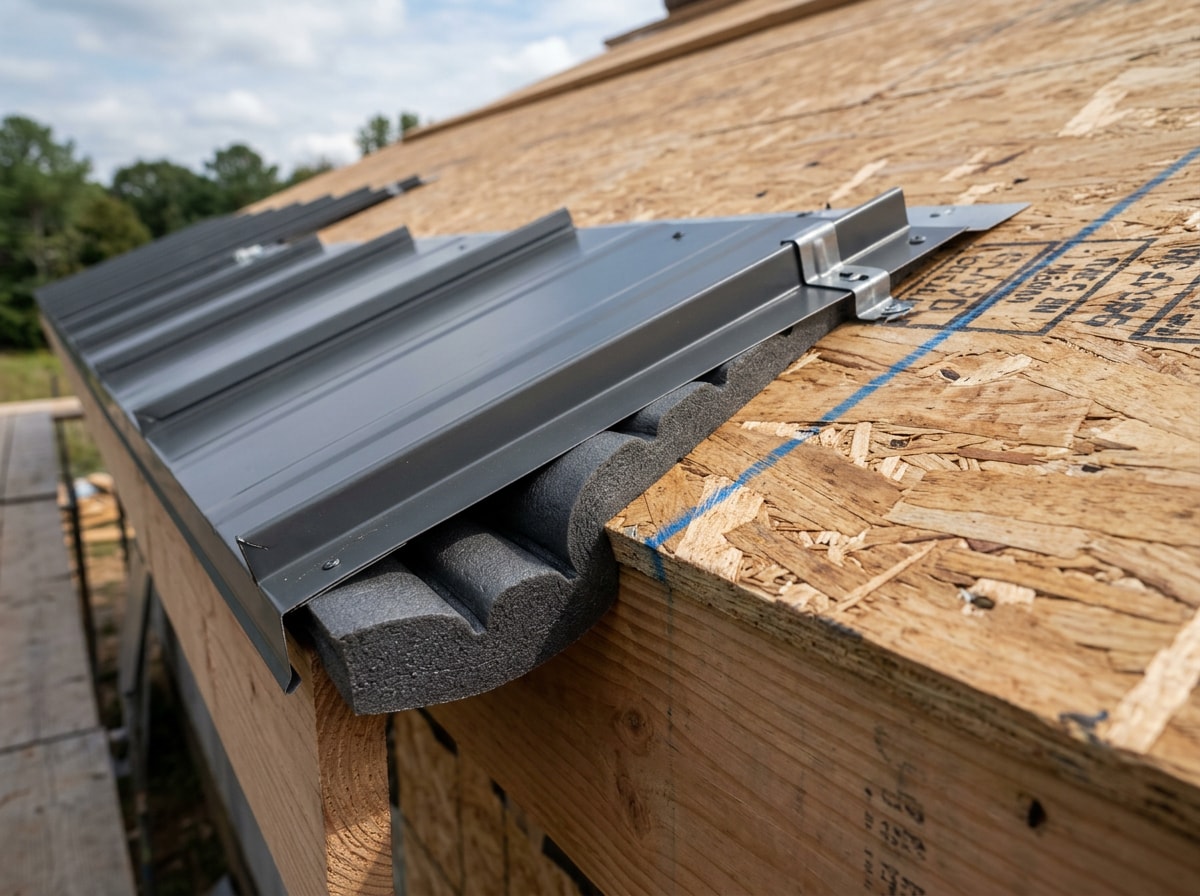
The first panel sits on the inside closure strips and typically overhangs the eave by about an inch, giving water a clean drip point instead of letting it run back under the fascia. Each following panel overlaps the one before it and lines up with its ridges running perpendicular to the eave, which keeps the whole field looking straight from the ground.
Getting that first panel square matters more than any other single step in the layout. A crew that rushes it usually ends up with a visibly crooked roof by the time they reach the far edge.
Driving the screws correctly:
- Place screws on both sides of every rib at the eave, lined up through the closure strip.
- Space rows no more than 24 inches apart, working bottom to ridge.
- Overlap each row by 1 to 2 inches as you move up.
- Drive washered screws into the flats of the panel, never the ribs, spaced every 12 to 24 inches.
- Stop tightening once the washer compresses lightly. Overtightening crushes the rubber seal and creates a leak point that won't show up until the next storm.
Fastener spacing and pull-through resistance aren't guesswork. Testing like ASTM E 1592 lets designers and engineers determine the maximum allowable spacing for clips and fasteners, as well as the best type of substrate or purlin support , and the Metal Construction Association's clip and fastening guidance is worth a look if you want the engineering behind the spacing numbers above.
How Metal Shingles Are Installed Differently
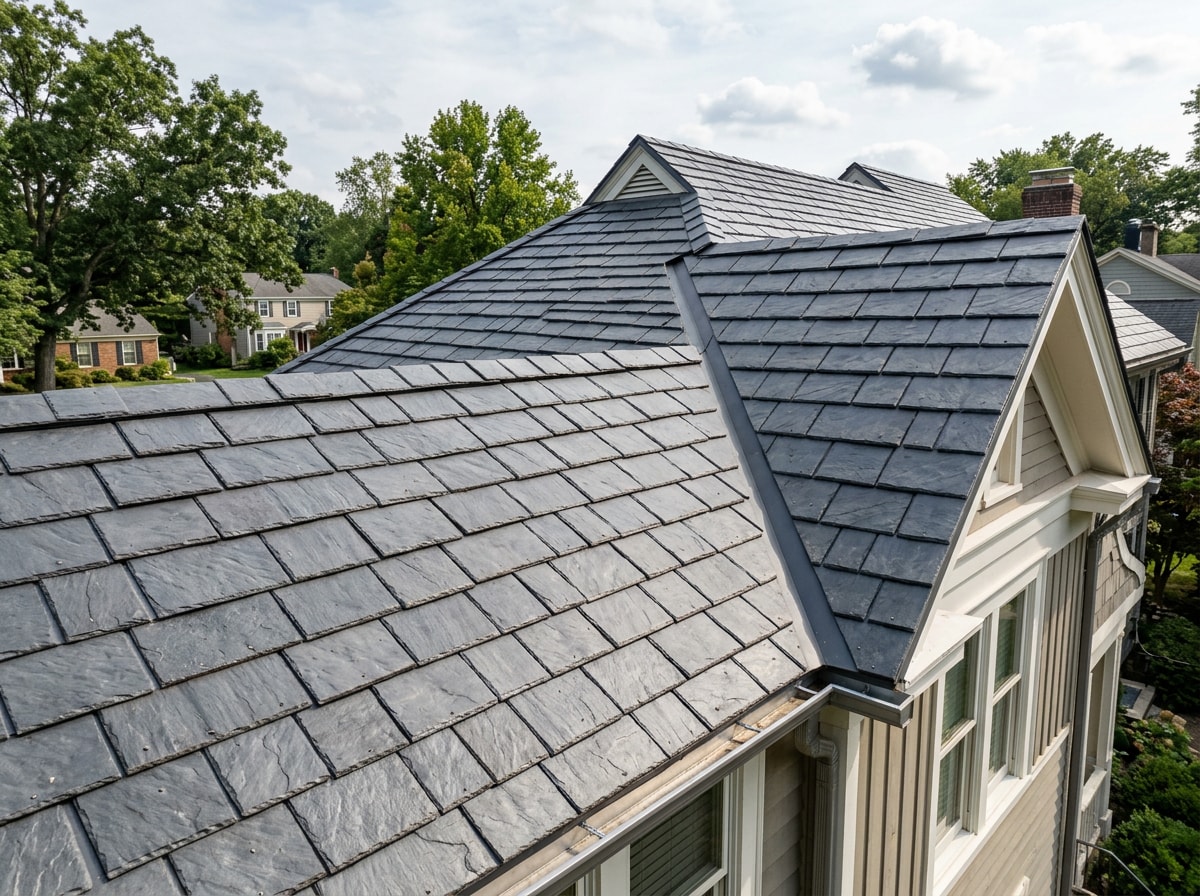
Metal shingles follow a different rhythm than panel systems since they go down in overlapping courses instead of long continuous sheets. The first course sets the alignment for the entire roof, and each following shingle locks, overlaps, clips, or fastens according to that specific manufacturer's system, details vary enough between brands that mixing instructions from two different product lines isn't a good idea.
Valleys, eaves, rake edges, sidewalls, roof penetrations, hips, and ridges all rely on dedicated trim and flashing pieces built for that particular shingle profile. Because so many small components come together at transition points, metal shingle installs tend to take more hands-on attention per square foot than large panel systems, even though deck prep and underlayment stay nearly identical.
Step 4: Install Ridge Caps, Trim, and Flashing
Once panels or shingles are down, the trim is what actually seals the roof against wind-driven rain and snowmelt.
Eave trim: Installed tight against the fascia and fastened to the deck over the underlayment with roofing nails. This piece (sometimes called drip edge) directs water away from the fascia and into the gutter system instead of letting it seep behind it. A gap here undermines the whole installation, and it's also the point where a gutter installation ties into the new roof.
Gable trim: Goes on after the panels are fully fastened, cleaning up the exposed panel edge along the rake and blocking wind-driven rain or snow from sneaking underneath.
Ridge cap: Finishes the job. It's secured with outside closure strips and sealant, then fastened through every rib using long screws for a firm hold against wind uplift.
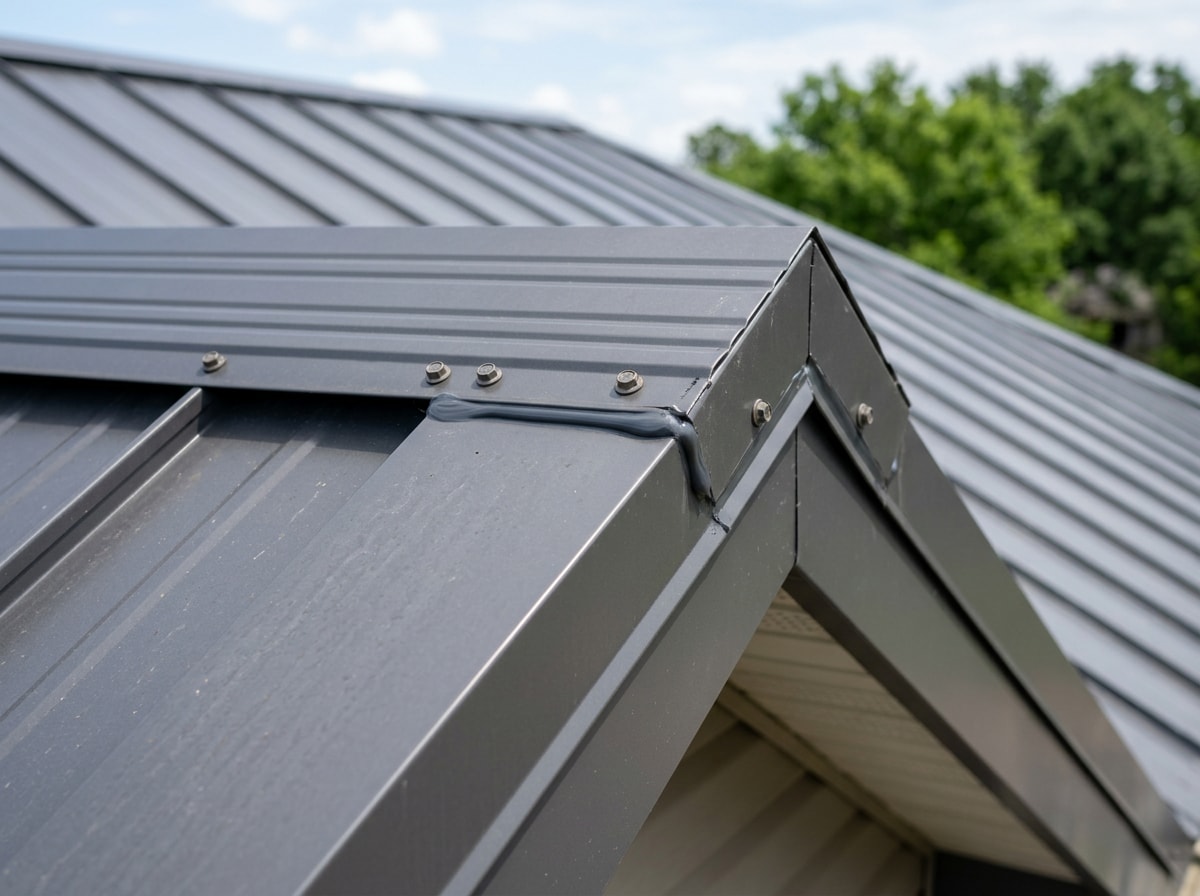
A reflective metal finish does double duty once the roof is sealed up. ENERGY STAR notes that reflective roof products can downsize cooling equipment needs, with a reflective roof able to reduce peak cooling demand by 10 to 15 percent , according to the EPA's ENERGY STAR roofing fact sheet.
Ready to get the sequence right the first time? Get a free estimate and we'll walk your roof before quoting a system.
FAQ
What are the pros of a metal roof?
Metal roofs generally last several decades longer than asphalt shingles, need little routine maintenance, and resist moss, mold, and other organic growth better than shingles do. Their reflective surface also tends to lower cooling costs in hot climates by bouncing back solar heat instead of absorbing it.
What are the cons of a metal roof?
The biggest downside is upfront cost; metal roofing typically costs noticeably more than a standard asphalt shingle roof, which can make it a harder sell for budget-conscious homeowners even with the long-term savings. For the actual numbers side by side, see our breakdown of metal roof cost versus shingles.
How long does it take to install a metal roof?
Most installations take anywhere from a few days to around two weeks, depending heavily on roof size, pitch, system type, and weather delays. A simple roof with exposed-fastener panels generally moves faster than a complex roofline with multiple valleys and a standing seam system.
Can you install metal roofing over shingles?
In some cases, yes, local building codes and the condition of the existing shingles determine whether an overlay is allowed. Even where it's permitted, a full tear-off is often recommended so the crew can inspect the deck underneath for rot or damage an overlay would otherwise hide. A roof replacement visit can confirm which option your roof qualifies for.
Does poor installation cause metal roofs to leak?
Yes, more often than the material itself. Most metal roof leaks trace back to underlayment gaps, overtightened screws, or flashing that wasn't sealed correctly, not a failure of the panels. Our full comparison on whether metal roofs leak more than shingles digs into where leaks actually start.
What's the best underlayment for a metal roof?
Synthetic underlayment is the most common default because it handles heat well and resists tearing. Self-adhered ice and water shield is worth the extra cost at eaves, valleys, and low-slope sections in hail- or wind-prone regions. Felt is the cheapest option but breaks down fastest under the heat that builds up beneath metal panels.